Installing a wood stove is a great way to heat your home, but safety should always come first — especially when it comes to wall protection. A wall heat shield allows you to safely install a wood stove closer to combustible walls by creating a thermal barrier that reduces clearance and protects surfaces from intense radiant heat.
Whether you’re outfitting a cabin, tiny home, or off-grid setup, a proper heat shield can also improve heating efficiency and give your installation a clean, finished look. In this guide, you’ll learn why heat shields are essential, what materials work best, and how to install one step-by-step in compliance with fire safety codes. If you’re a DIYer, this is one stove upgrade that’s both smart and affordable.
Why You Need a Heat Shield Behind Your Wood Stove
A heat shield is not just a smart addition to your wood stove setup — it’s an essential safety upgrade that protects your home and ensures your installation meets legal fire codes. Wood stoves radiate intense heat, especially when installed in small spaces or near combustible materials like drywall, wood paneling, or even furniture. Without a proper barrier, that heat can become a serious fire hazard.
According to fire safety standards like NFPA 211, most wood stoves require at least 36 inches of clearance from combustible walls. However, installing a certified wall heat shield can reduce that required clearance to as little as 12 or even 6 inches, depending on the design. That’s a game-changer for homeowners working with limited space — such as cabins, tiny homes, or workshops.
But safety isn’t the only benefit. A well-installed heat shield:
-
Improves heat efficiency by reflecting warmth back into the room.
-
Protects walls from discoloration, warping, or cracking.
-
Adds a professional, clean look to your stove installation.
In short, if your wood stove sits within a few feet of a wall, a heat shield isn’t optional — it’s an investment in both protection and performance.
Heat Shield Materials and Design Options

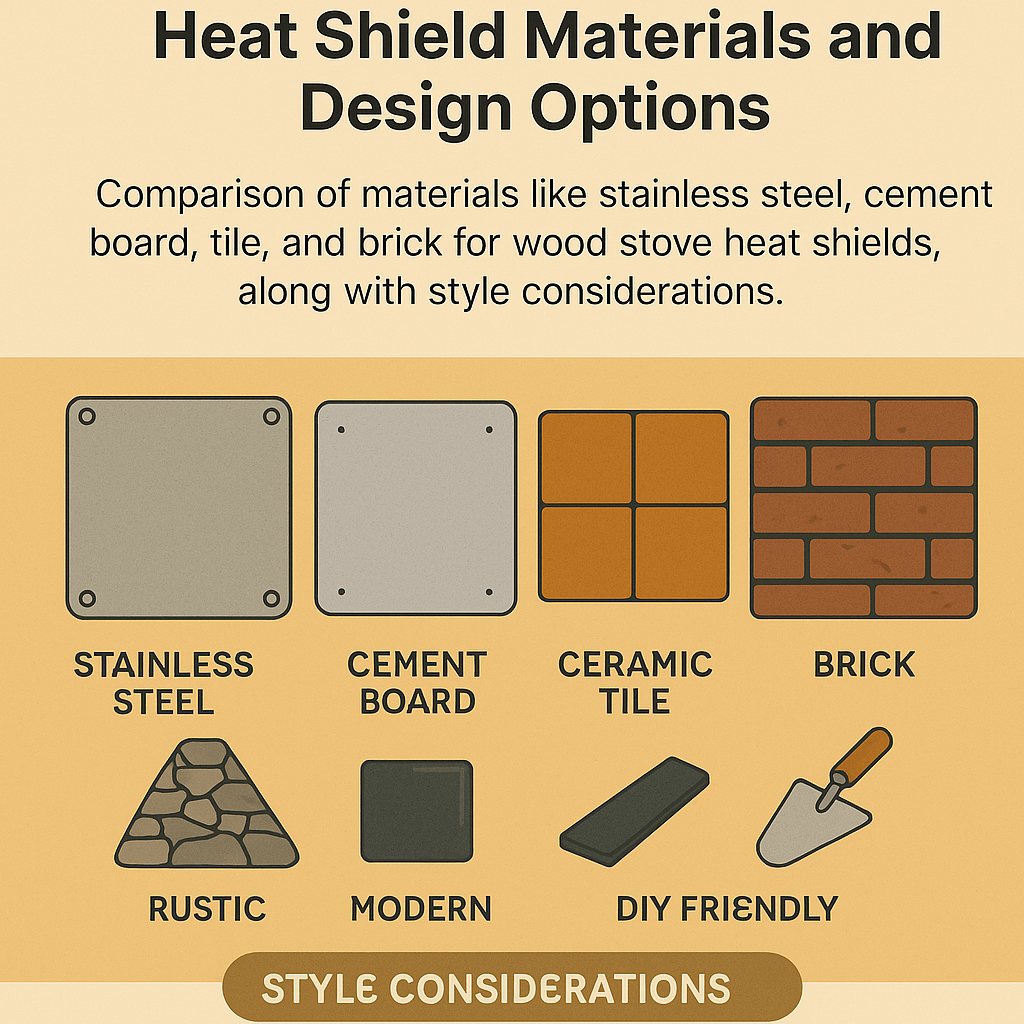
Choosing the right material for your wood stove heat shield depends on your space, budget, and aesthetic preferences. Fortunately, there are several safe and effective options to choose from — whether you’re looking for a minimalist look or a rustic cabin vibe.
🔩 Common Heat Shield Materials:
-
Stainless Steel: A popular choice for its clean, modern appearance and excellent heat resistance. Stainless steel panels are durable, easy to clean, and often used in professional installations.
-
Cement Board (e.g., HardieBacker): One of the most affordable DIY-friendly options. Cement board is fire-resistant and can be tiled over for a customized finish. It’s commonly recommended by wood stove manufacturers.
-
Ceramic Tile or Brick: Often installed over cement board, these materials add both thermal mass and visual character to your space. They’re ideal if you’re aiming for a cozy, traditional aesthetic.
🔗 External Resource: For a technical overview, the Wood Heat Organization offers expert advice on heat shield construction and safety standards.
🎨 Style Considerations:
-
Rustic: Use corrugated tin, salvaged metal, or stone veneer for a vintage or off-grid look.
-
Modern: Go with smooth black steel panels with hidden fasteners and clean mounting.
-
DIY Friendly: Cement board with ceramic tile is a budget choice that offers endless design flexibility.
🧭 Want to make sure your whole setup is safe? Check out our full guide on
👉 Wood Stove Pipe Maintenance: Keep It Safe and Efficient Year-Round
Clearance Requirements and NFPA Guidelines

Before you install your wall heat shield, it’s critical to understand clearance codes and fire safety standards. The National Fire Protection Association’s NFPA 211 outlines the proper distances and requirements for safely installing wood stoves and heat shields near combustible materials.
🔥 What Are Clearance Requirements?
Clearance is the minimum distance required between a heat-producing appliance and nearby walls, ceilings, or floors made of combustible materials (like wood or drywall).
-
For a standard single-wall stove pipe, the clearance is usually 18 inches.
-
With a certified wall heat shield, that can be reduced to as little as 6 inches, depending on the shield’s design and material.
📌 Always check your stove’s manual — many manufacturers include specific clearance guidelines.
📘 NFPA 211 Heat Shield Guidelines:
-
Air Gap Requirement: The shield must be mounted at least 1 inch away from the wall using non-combustible spacers (like ceramic or metal washers).
-
Bottom Ventilation: The shield should start at least 1 inch from the floor to allow for airflow.
-
Top Opening: Leave an opening of at least 1 inch at the top for rising hot air to escape.
These details ensure that the shield functions not just as a barrier but as a radiant deflector, keeping wall temperatures lower and preventing ignition.
🔗 External Source: NFPA 211 Summary (CSIA.org) – Industry standards for solid fuel appliance installation.
🧯 Want to go deeper into wood stove safety?
Check our full guide 👉 Is It Safe to Run a Wood Stove Overnight? Expert Tips & Setup
Step-by-Step Heat Shield Installation Process

Installing a wall heat shield may seem intimidating at first, but with a little planning and the right tools, it’s a manageable DIY project. Here’s how to install a heat shield safely and in compliance with code.
🧰 Step 1: Gather Tools and Materials
Before you begin, make sure you have everything you need:
-
Heat-resistant material (stainless steel panel, cement board, etc.)
-
Non-combustible spacers (metal washers, ceramic spacers)
-
Screws, anchors, and a power drill
-
Tape measure, level, and pencil
-
1-inch spacers to create an air gap from the wall
-
Heat-resistant caulk (optional for aesthetics)
📏 Step 2: Measure and Mark the Wall
-
Use a tape measure and level to mark the exact placement of the heat shield.
-
Ensure it will cover the full height and width required by your stove’s clearance specs.
-
Leave at least 1 inch of space at the bottom and top of the panel for ventilation.
🔩 Step 3: Mount Spacers and Attach Shield
-
Screw the spacers or furring strips into the wall studs to support the shield.
-
Align your panel with the spacers and screw it in securely, maintaining a 1-inch air gap throughout.
-
If using multiple panels (e.g., tiles or metal sheets), overlap edges slightly for better thermal control and appearance.
✅ Step 4: Final Inspection and Test
-
Double-check that all spacers are secure and the panel is firmly mounted.
-
Use a level to make sure the shield is straight.
-
Start a small test fire in the stove and feel around the wall area — the shield should significantly reduce wall temperature.
🔗 Pro Tip: Use fire-rated silicone at the panel edges for a clean, sealed look — but don’t block airflow at the top or bottom.
Maintenance and Troubleshooting
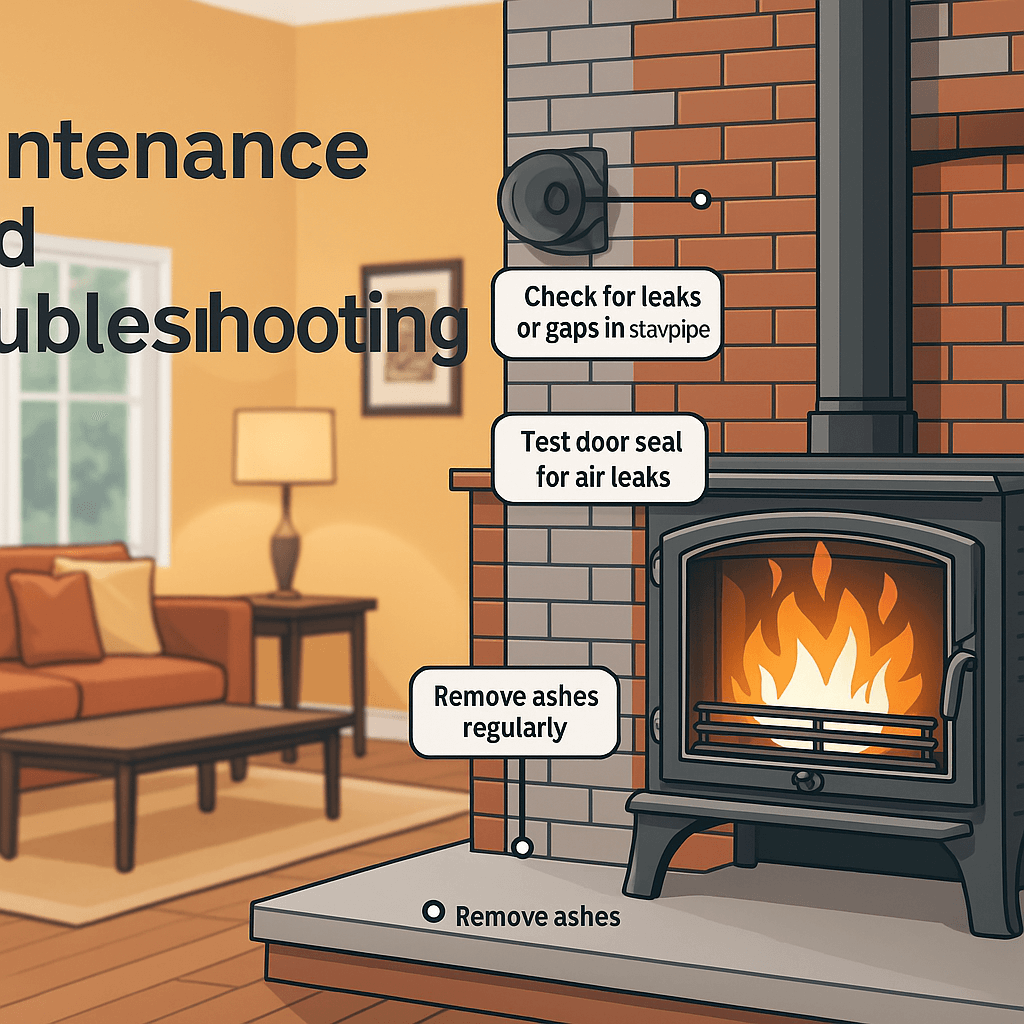
Once your heat shield is installed, your job isn’t done. Regular maintenance ensures that your setup remains safe, efficient, and compliant for years to come. Ignoring minor issues can lead to long-term damage or fire risks, so here’s how to keep everything running smoothly.
🔍 Inspect Your Heat Shield Monthly
-
Check for any warping, discoloration, or soot buildup on the shield surface.
-
Look for loose screws or damaged spacers, especially after high-heat burns.
-
Clean with a soft brush or vacuum to remove dust and ash that may collect behind the panel.
🧪 Test for Leaks and Airflow
-
Use incense smoke or a thermal leak detector to spot air leaks near the wall or pipe junctions.
-
Make sure the air gap behind the shield is unobstructed to maintain airflow and heat deflection.
♻️ When to Replace the Shield
-
Replace if the shield becomes bent, rusted, or detached from spacers.
-
If you notice a strong smoke smell or excessive wall heat — this could mean the shield is failing.
Installing a wall heat shield for your wood stove isn’t just a smart upgrade — it’s a crucial safety measure that protects your home and allows for more flexibility in placement. From choosing the right material and following NFPA clearance guidelines to completing a secure installation, each step plays a role in creating a safe, efficient heating setup.
Whether you’re outfitting a small cabin or improving your main home’s stove area, this guide equips you with everything needed to do it right. Regular inspections and care will keep your heat shield effective for seasons to come — and give you peace of mind every time you light the fire.

